If you plan to develop videos for your social media channels, green screens allow you to get creative. They facilitate the chroma keying compositing technique to add, remove, and edit backgrounds in videos. You can appear to be anywhere in the world instead of sitting at home or in your office.
But what is a green screen and how does it work? That’s exactly what we’re going to look at today.
Using a tool like Vizard’s AI video editor, video creators can compose, and repurpose, videos for their different social media channels. The intelligent software also auto-translates your audio into 29 different languages. Easily create short video snippets from long-form videos to captivate your audience and maintain interest.
When it comes to adding visual effects to your videos, using green screen is the best way to go. Let’s dive into the world of green screens and discuss how to use them for social media video creation.
What is a Green Screen?
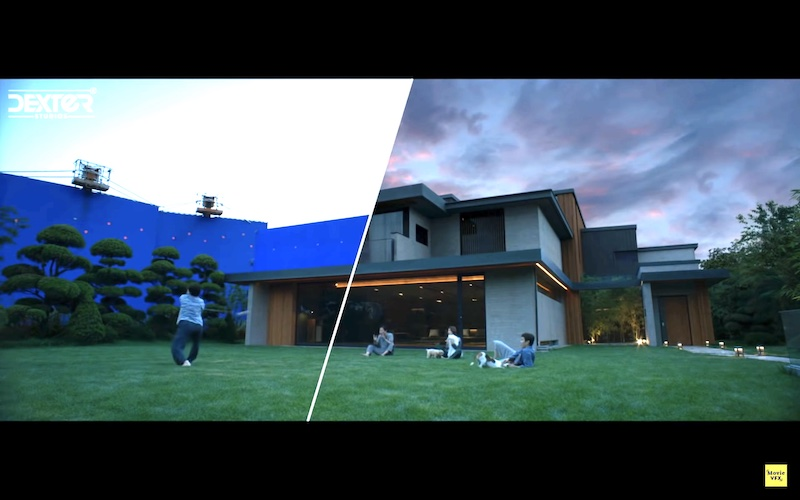
A green screen is a solid, bright green background used in video production. Using these screens, video creators can undergo chroma key compositing. This involves isolating the color green so they can easily add different layers into the video during post-production. Chroma key compositing is used to incorporate different visual effects into the video, which might otherwise be costly, difficult, or even impossible to achieve.
While green screens are often made of synthetic nylon spandex, you can actually use any kind of solid green material for your green screen, admittedly with varying results. You can even paint a wall bright green and shoot your social media videos in front of that to achieve a similar effect. The green screen, whatever it’s made of, is essentially a placeholder for your background which you’ll replace later on.
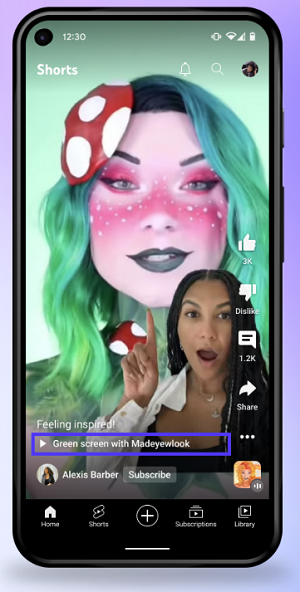
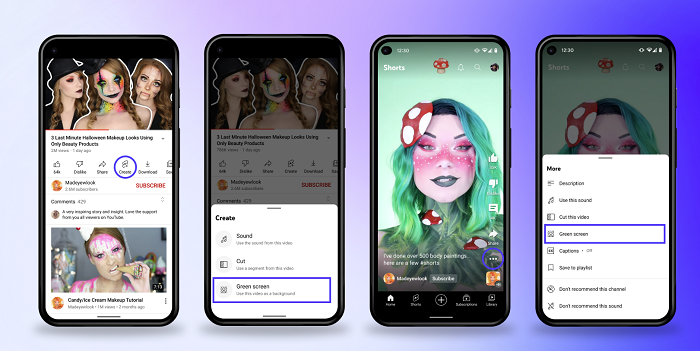
Here’s an example of a YouTuber making use of YouTube’s recently-added Green Screen feature. This functionality is available for creating YouTube Shorts. You simply select the Green Screen option and upload your chosen background onto your video.
How Does Green Screen Work?
Green screens work by replacing all the pixels of the specific shade of green in a video with a different image or video. The solid color makes it easier to alter and layer backgrounds without risking discrepancies like color spilling. This technique is known as chroma key compositing and is used for big budget movies, as well as short social media content, such as Facebook videos.
The chroma key compositing process requires video editing software, which helps the video producer to seamlessly switch backgrounds. The color green is used because it contrasts the most with human skin tones, so it’s the easiest color to isolate in video footage.
A popular example of a green screen in action for weather maps. When a presenter recites the weather on TV, the map behind them obviously isn’t real. The presenter stands in front of a green screen which is replaced digitally with the dynamic and ever-changing weather map.
Blue Screen vs Green Screen
What’s the difference between blue screen and green screen? Blue screens and green screens work best when they contrast with the color of the images at the forefront of the footage. There are generally two color choices when it comes to screens; green and blue. Let’s have a look at the differences between the two:
Use of Digital Cameras
The main difference between green screen and blue screen is the result you get using a digital camera. If you’re using a digital camera for your social media videos, green screens are normally preferable over blue screens. This is because they provide more detailed information to digital cameras, as well as your editing software. Therefore, borders between the people, props, and background are cleaner and clearer.
Color Spill
When you remove the blue or green screen post-production, some color might ‘spill’. This means that your subjects can end up with odd colors around their edges or hairlines. Green screens have a higher luminosity than blue screens, which means they reflect more light. This additional light reflection can cause more color spill than if you’re using a blue screen as the light bounces off your subjects. Therefore, the bluescreen effect can be better for night time scenes.
The Prevalence of Blue
The color blue shows up more in clothing and video sets in general. For the best results, the blue or green screen should contrast with the other colors in the video. This makes it easier to isolate the screen and change it. That being said, a blue green background is the more appropriate choice when filming nature scenes, for example, because grass, trees, and shrubbery are often green.
Lighting
When you’re considering green screen vs blue screen, you need to think about your lighting. As already mentioned, green screens have greater light reflection than blue screens. This doesn’t just impact color spill though. The higher luminosity means that less additional lighting is required when using green screen. Therefore, green screens are more appropriate for filming daytime scenes and indoor scenes.
When you use a green screen instead of a blue screen, the finished result is brighter. Conversely, blue screens are better for filming nighttime scenes because there is less light reflection.
Why Use a Green Screen?
- Consistency: If you film without a green screen, you have to account for changes in sunlight and other surrounding lights. A green screen blocks out these changing lights which gives you a consistent result each time you film a scene or video.
- Creativity: One of the most obvious benefits of using a green screen is the creativity it allows. You can make your social media videos more interesting and captivating by adding different backgrounds and visual effects.
One day you could be standing in front of the Great Pyramid of Giza and the next you could be relaxing on a tropical beach. You can create a selection of high-resolution images to use for your backgrounds that are relevant to the mood you want to achieve. You can then pick and choose which background to use for each video.
- Save time and costs: If we’re going to go with our previous examples of pyramids and tropical beaches, suffice to say that doing this in real life would be time-consuming and costly. In contrast, a green screen is a relatively cheap piece of filming equipment and it’s also quick and easy to achieve your desired results. Green screens allow you to ‘travel’ to an endless number of different locations, both real and imaginary, without the costs involved.
How to Use Green Screen Filters on Various Apps
For YouTube
If you’re creating YouTube Shorts, you can use the Green Screen function by:
- Selecting ‘Create’ on a video.
- Selecting ‘Green Screen’ from the menu.
Alternatively, if you’re in the Shorts player, you can go to the 3-dot menu then select the Green Screen option.
You can use up to 60 seconds of eligible video footage for the background of a new YouTube Short.
For TikTok
Head over to your TikTok app. Click on the plus icon to begin creating a new TikTok video and set your timer for your video length. To use the green screen option:
- Click ‘Effects’, which is located in the bottom left of the screen.
- From the ‘Trending’ tab, you can choose either Green Screen or Green Screen Video, depending on whether you want an image or video background.
In the image below, the Green Screen icons are the bright green ones with scenic squares and white arrows. The Green Screen Video option is the one with the ‘Play’ button in the centre, while the one without this is the icon for adding an image background.
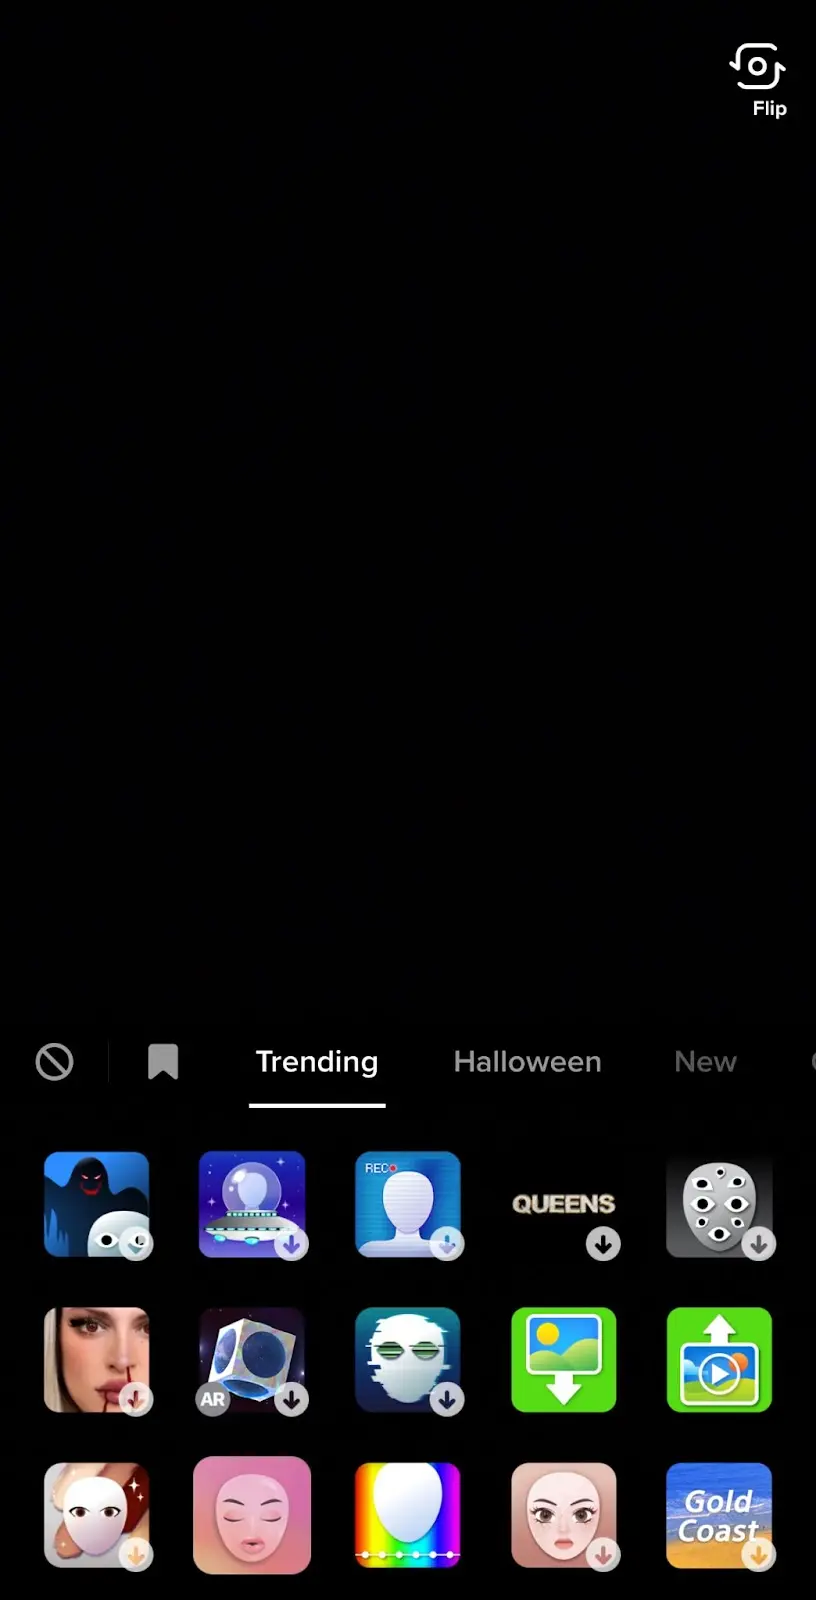
Click on either of these then upload the image or video from your device. Once you’ve done this, you can go ahead and record your video as you normally would.
For Instagram
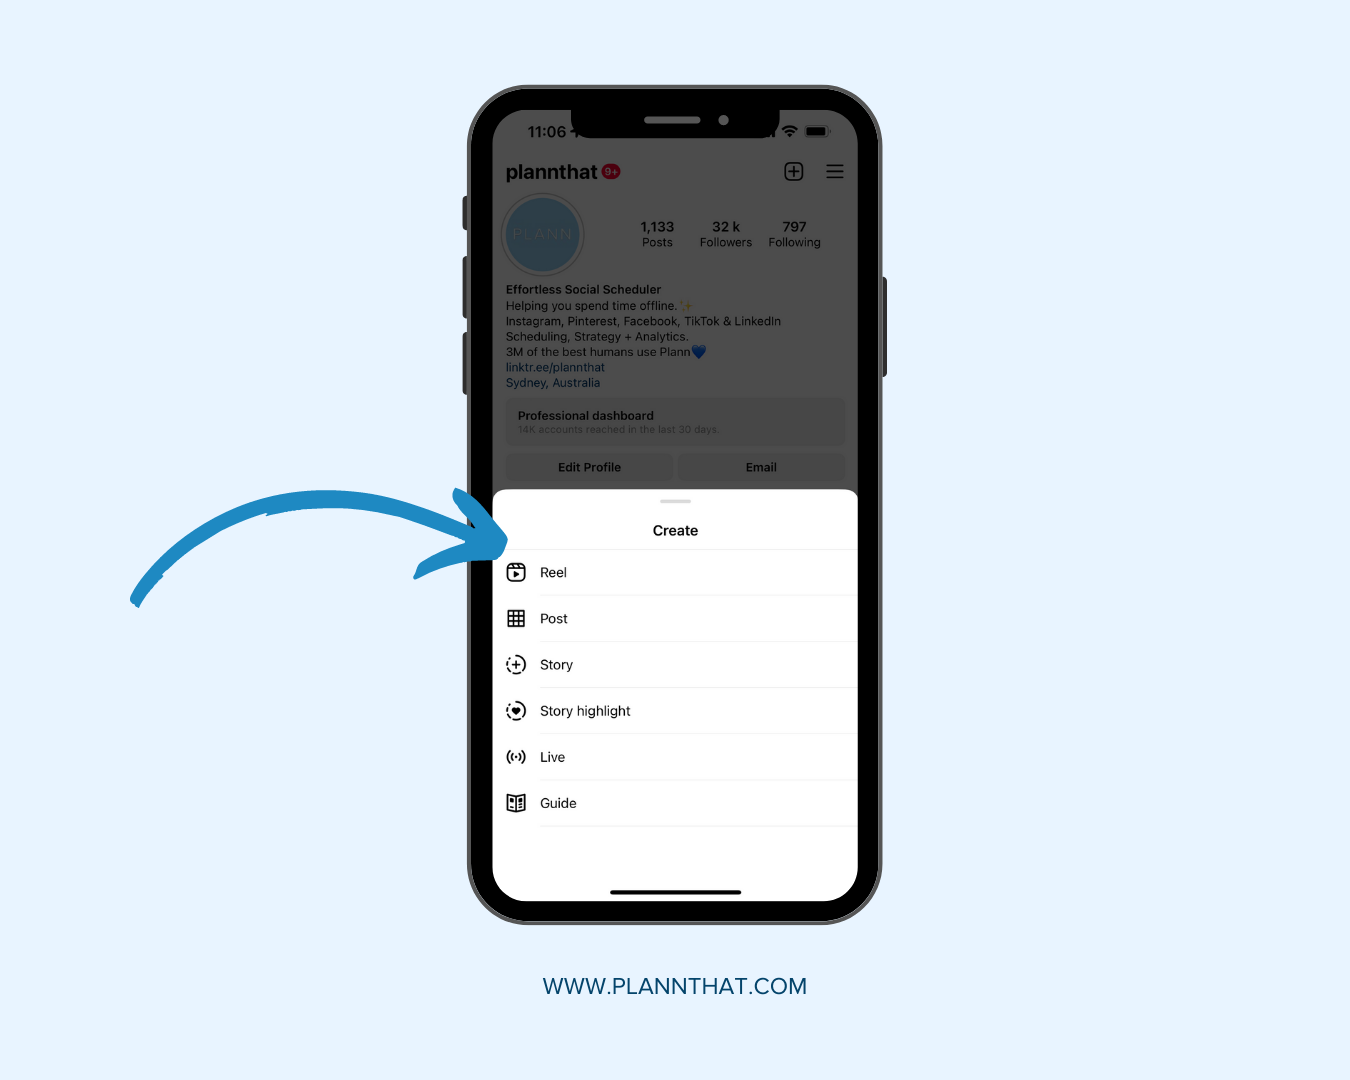
Like YouTube and TikTok, creating an Instagram Reel with Instagram’s green screen feature is simple. Here’s how to do it:
- Go to your Instagram account and click on the + icon.
- Select ‘Reel’ from the menu.
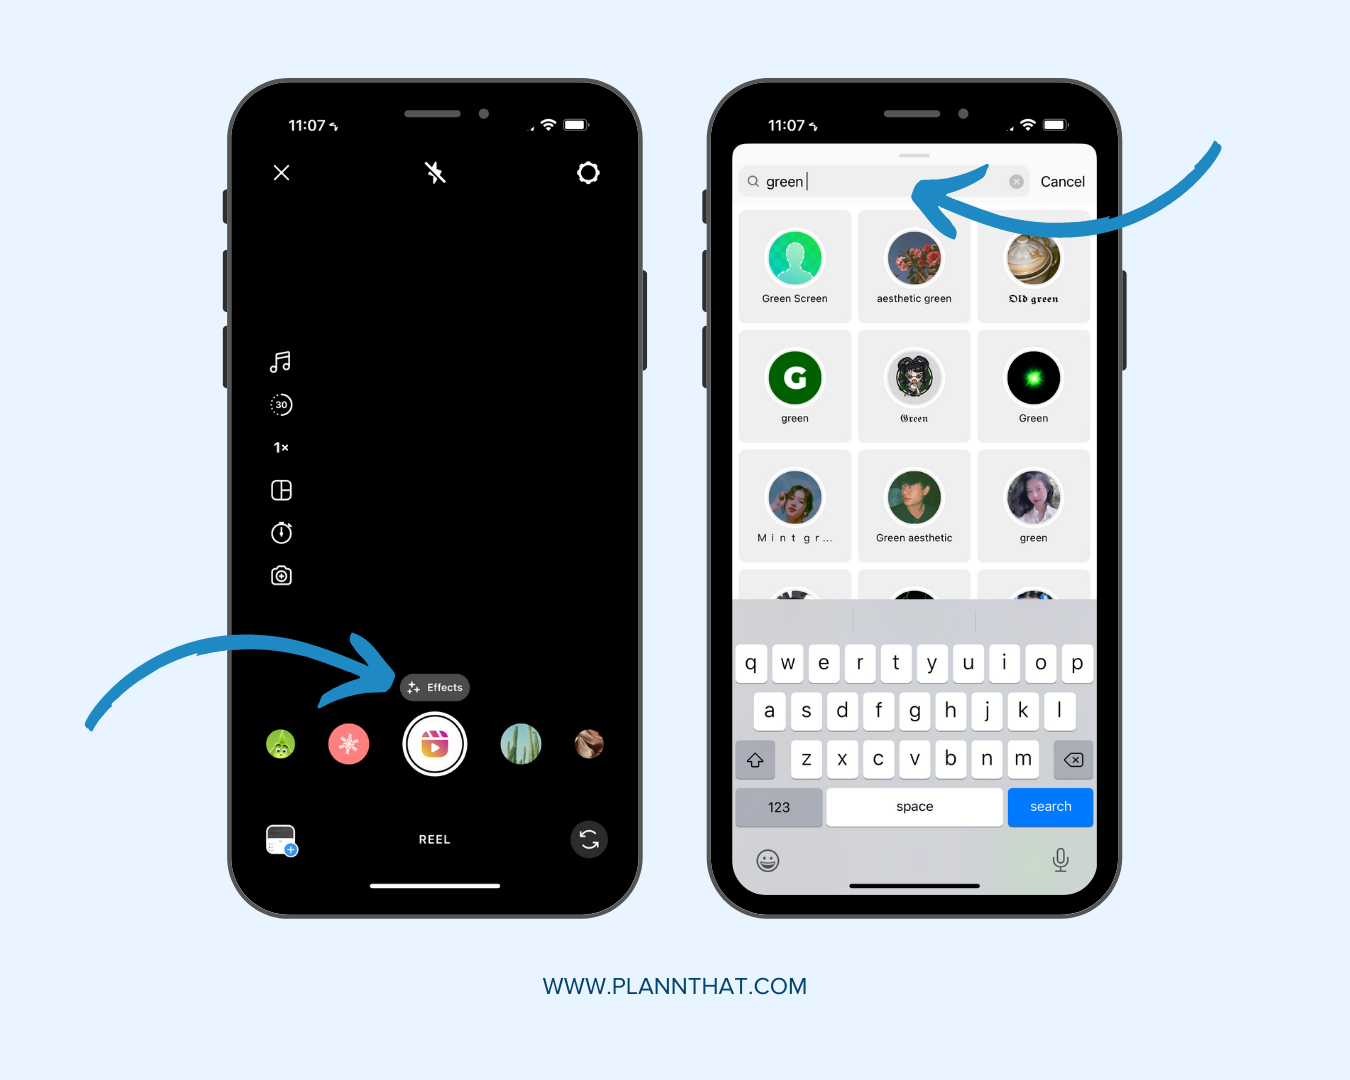
- Tap ‘Effects’.
- Type ‘green screen’ into the search bar.
- Choose the green screen option at the top and bookmark it by tapping on the ‘bookmark’ icon. This will save this option to your Reels effects menu.
- Next, click the green screen icon, which will apply the green screen effect to your Reel.
- Return to the Reels page to continue creating.
To add your image or video to the background of your Reel, tap on ‘Add Media’ and select the one you want to use. Then tap the camera icon to choose whether to record with the front or back camera.
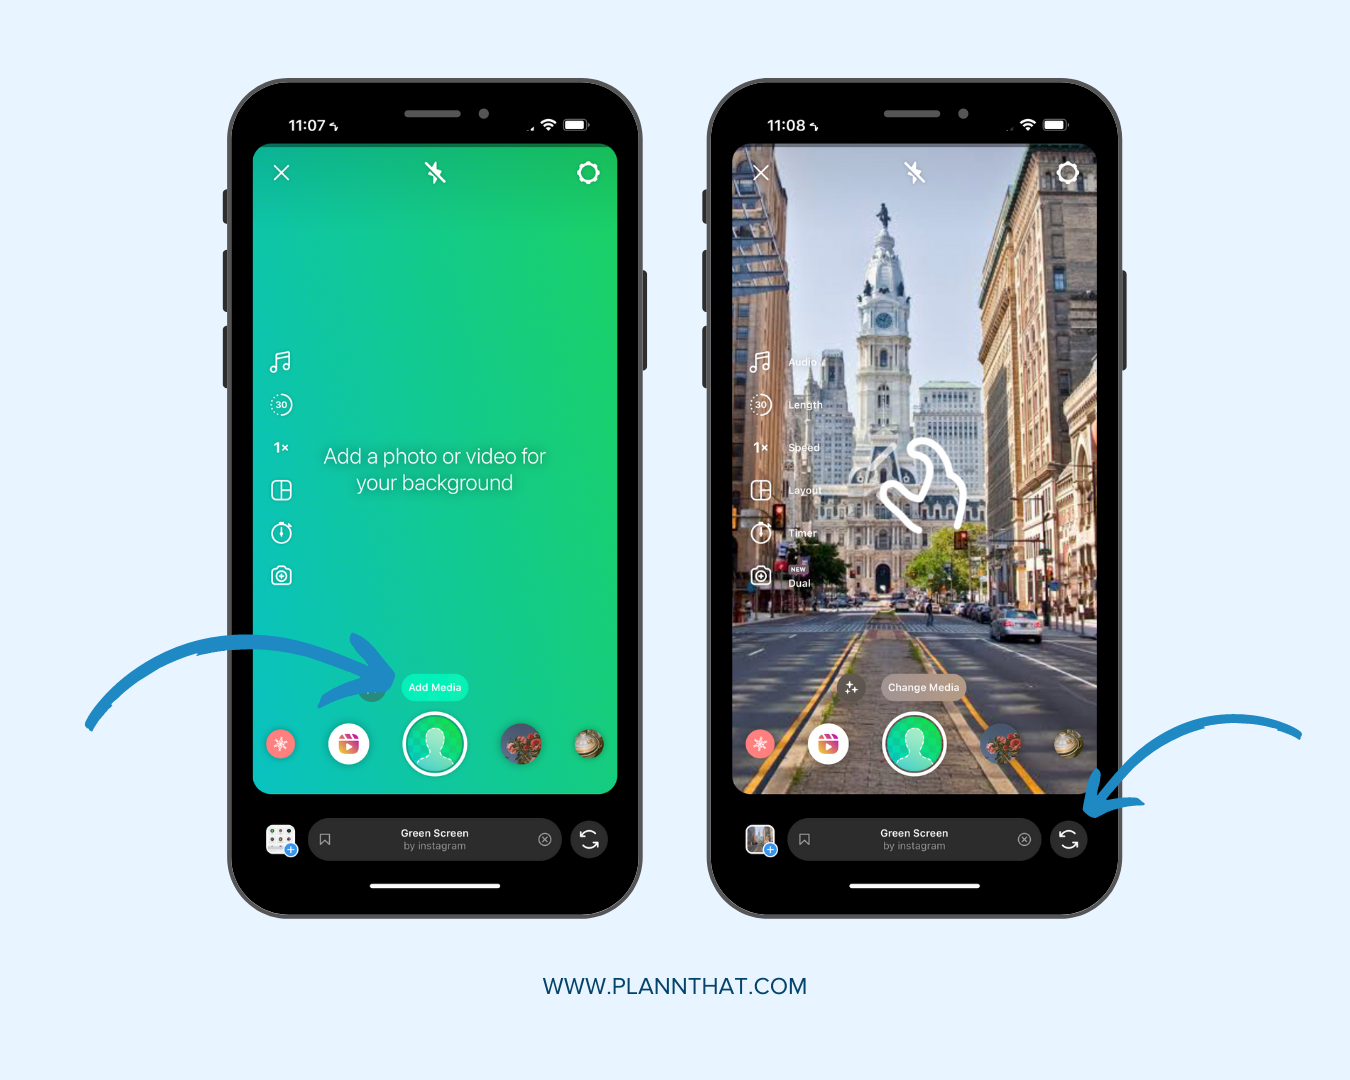
Now you simply record your Reel and post it to your channel.
How to Use a Green Screen
You can buy green screens from plenty of different online stores, including Amazon. At the time of writing, a 4 x 5 FT green screen from Amazon costs just $9.99. If you’re going to film videos for your social media channels regularly, it might be worth purchasing a physical green screen, as opposed to using an app-based digital one.
Here are the steps to take if you want to use a physical green screen:
Step 1: Set Up Your Screen
Your green screen needs to be hung properly, with no wrinkles or creases. To make it as flat as possible, you might want to iron it before hanging. Alternatively, you can invest in a wrinkle-resistant matte screen to avoid dealing with the wrinkles every time you use it.
Once you’ve ensured your green screen is as smooth as can be, you need to attach it to a frame. Like your green screen, you can also purchase a frame from Amazon. These typically come equipped with all you need to hang your green screen, such as crossbars and backdrop clamps.
Step 2: Light Your Green Screen and Your Subject
How to Light a Green Screen
Your green screen should be evenly lit otherwise you’ll end up with shadows and odd lighting effects. Point two fluorescent lights at the screen, one standing to the left and one standing to the right. Angle both lights the same so there are no shadows or inconsistencies with the lighting. Additionally, the lights should be exactly the same type so there are no variations in brightness or color temperature.
How to Light Your Model
When using green screen, your model needs to stand at least 8 feet from it to minimize the chance of color spill.
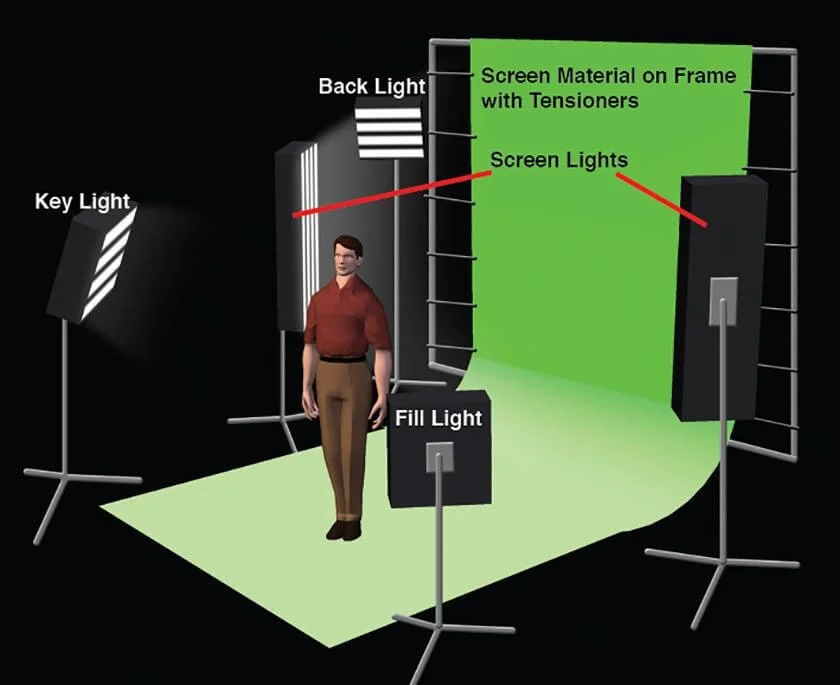
To set up your lighting for you or your model correctly, you’ll need three types of lights:
- Key light: This is the main source of light for your model or subject. Place it so the light shines from a direction where a light source would usually come from, for example a ceiling light or the sun.
- Back light: As the name suggests, a back light is placed behind the subject. It creates depth to the subject and defines its shape. It also separates the model or subject from the background so it doesn’t look so flat.
- Fill light: The fill light reduces and softens shadows in your video that might be cast from your key light. It creates more even lighting and can be used to adjust the contrast ratio to alter the ambience of the shot. The fill light is typically angled the same as the key light but placed at the opposite side of the production area.
The lighting for your model should be a little darker than the lighting for your green screen. For example, if you’ve set your green screen exposure to f/8 1/2 , set your model’s exposure to f/8.
Step 3: Use Proper Clothing
If you’re using a green screen, the number one clothing rule is to not wear anything green. Doing so can cause a translucent effect on the green clothing after the chroma keying process. This rule also applies to green make-up and accessories. In short, if it’s green, keep it well away.
The subject or model should also remove all jewellery, glasses, and any other objects that might reflect light. Reflective items can create a camera glare and also reflect the green screen. This would make editing the video much harder.
Step 4: Pick Your Camera
When you think of shooting green screen-worthy social media videos, no doubt you think of extremely expensive camera equipment. In reality, you can achieve good results with most digital camcorders, and even many smartphones.
A few general rules of thumb for choosing which camera to use are:
- HD-quality of 720p or higher.
- 24 fps or above.
- Compatible with your green screen software. For example, you can save your files in a compatible format.
Another consideration for your camera is its shutter speed functions. When your subject is moving around in front of the green screen, you might experience the dreaded motion blur. Rather than asking the subject to move slower, you can simply increase your camera’s shutter speed to, for example, 1/100 or 1/250. This can reduce the unwanted motion blur effect during fast or sudden movements.
Step 5: Shoot Your Video
Your next step is to shoot your video. Whether you’re getting in front of the camera yourself, or you’ve got someone else to star in your video, you need to make sure the subject remains in front of the green screen at all times. If you wander from the frame, you’ll be cut from the video during editing. This would, of course, look unprofessional and possibly ruin your final piece. You need to keep this in mind when using green screen backgrounds for streaming live too.
Step 6: Choose Your Editing Software
Your final step to using a green screen in your social media videos is to choose an editing software. There are lots of options online that have both basic and advanced features. Choose one based on your experience, budget, and the capabilities you need. Some useful features to consider are:
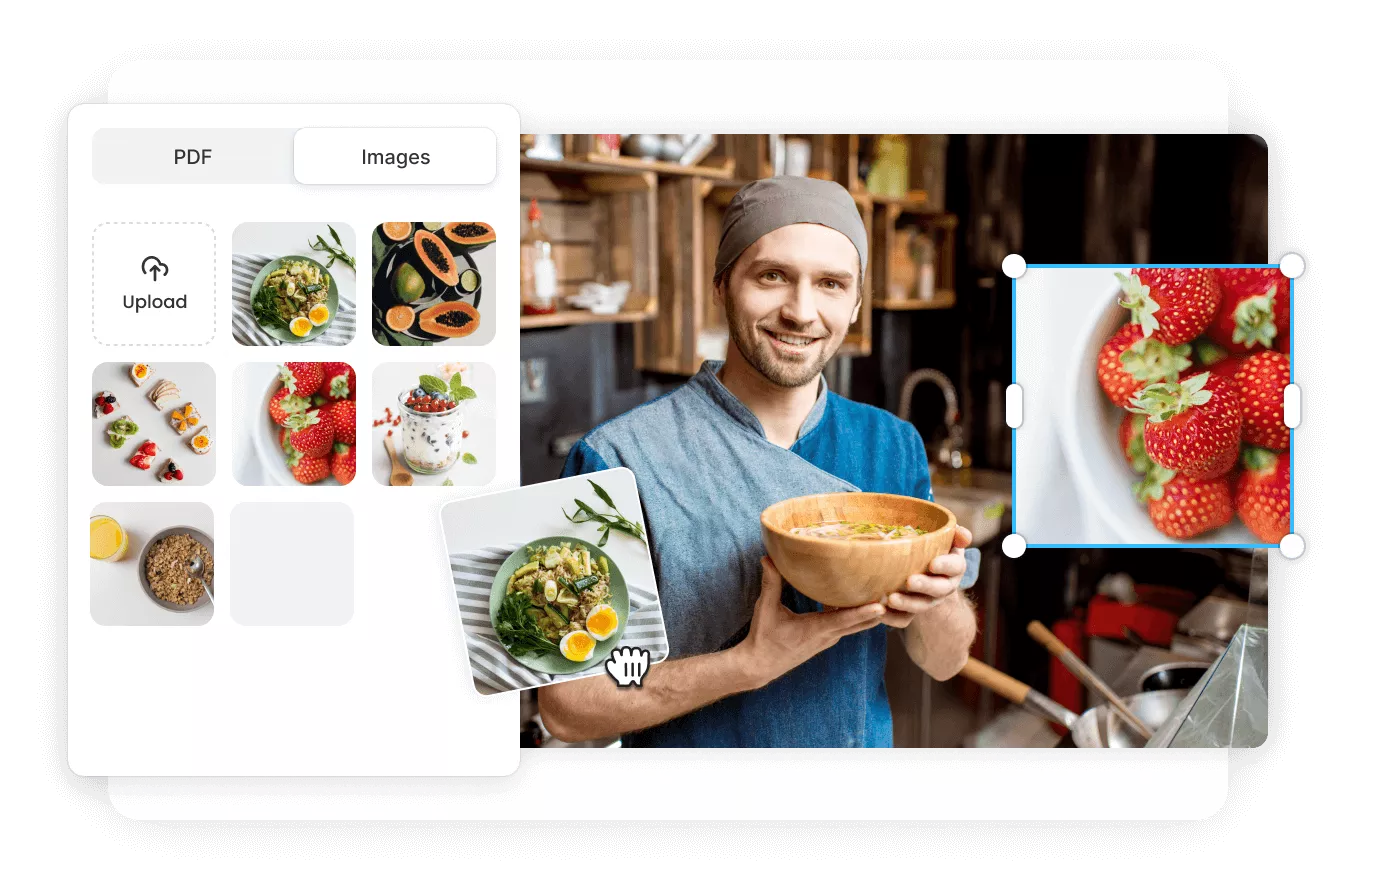
- Content aware fill: This allows you to remove objects from photos and transfer elements from one image to another.
- Selective color adjustment: Allows users to target individual colors in images and adjust them as needed.
- Video stabilization: This technique stabilizes a video’s shakiness by either reducing or eliminating it.
- Matte cleaner: Fixes color spill in videos shot with a green screen.
If you want to boost your branding so your fans can easily recognize your videos, consider using a video editing software, such as Vizard, that allows you to easily add your logo, text, and other branding elements to your content. Vizard is perfect for building a strong brand identity.
Vizard’s AI video editor enables videographers to divide their videos into individual scenes and alter each scene with images, titles, and overlays. The AI-powered software can even break up your long-form content and turn its highlights into multiple short-form clips.
Conclusion
Green screens can make the video production process considerably easier, and there are plenty of tools and software online to help you see your project through to the end. Many of these allow you to get professional-grade results at reasonable prices. If you want to take your video production even further, you might consider investing in a physical green screen, along with other equipment, like fluorescent lights.
Finally, use Vizard for the ultimate video branding experience. Crop, trim, and add your logo to your videos to build a strong brand identity. Ensure your videos are social-ready and upload a video to Vizard for free today.