In this guide, let’s walk you through how to record your screen and edit it in 3 simple steps with Vizard. First thing first, there are so many screen recorder app out there, why should you use Vizard?
The short answer is: because Vizard lets you record, edit and share your video all within browser so you don’t need to jump between tools. You can also use it to record different screen-recorded formats including video presentations, customer testimonials and more!
You can hit record from your browser, edit your recordings and share as a link – all within one platform. And the best part? It’s completely free with unlimited recordings and recording length.
With that out of the way, let’s take you through the steps to screen-record a video with Vizard.
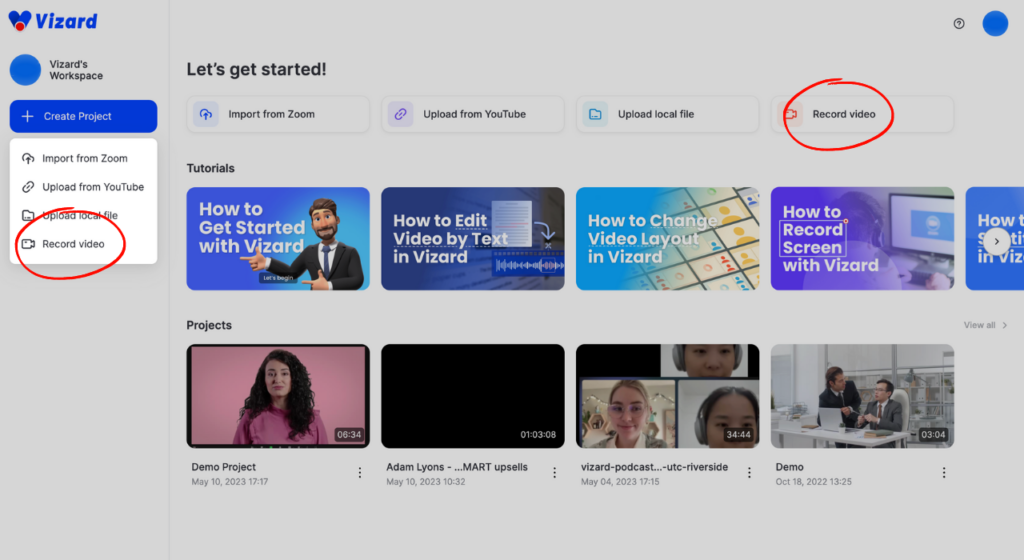
Step 1. Log into your workspace and click the “Record Video” button
Step 2. Choose the part of your screen you want to record: “Whole Screen”, “Window”, or “Tab”
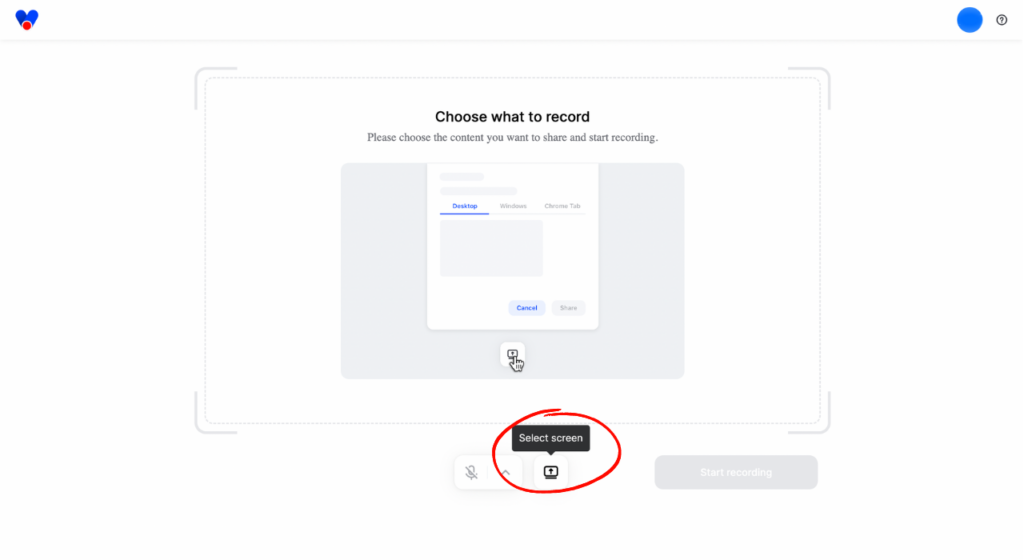
Pro tip: If you are MAC user, to record internal audio, select “Tab” and check the “Share tab audio” option. We currently do not support recording system sound.
Pro tip: If you are PC user, select “Tab” and check “Share system audio” for PC users. If you want to record external audio, select “Microphone” and choose your audio source.
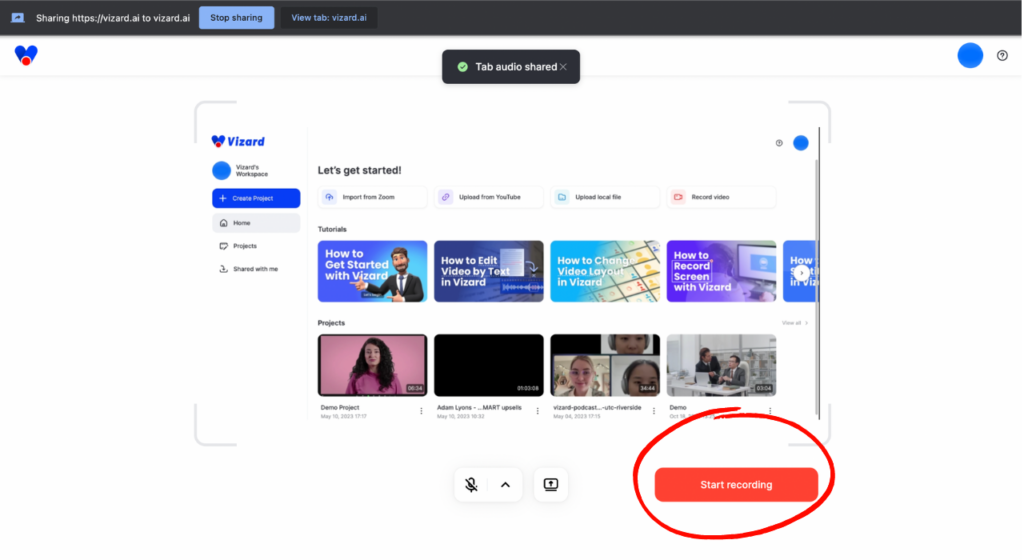
Step 3. Click “Start Recording” to begin recording your video
Step 4. When you finish recording, click “Stop” and preview your video
If you’re satisfied with it, click “Transcribe & Edit” to open it in the Vizard editor. Edit or download your video as needed!
Pro tip: “Whole Screen”, all of your screen activity will be recorded, while “Window” will only record activity within that window, and “Tab” will only record activity within the selected browser tab. And for Mac users, Vizard currently does not support recording standalone app’s audio. Tips: Before making your full screen recording, consider doing a 5 to 10 second test recording to make sure you have set everything up correctly.